
Here we go...
I firmly believe any machine works best, when it is maintained properly. If you haven't recently performed the regular machine maintanence, now is the time. Start by using the appropriate tools to clean out your machine. I like to remove the housing unit and clean all the thread out of it as well as the stitch plate. Don't use canned aerosol sprays as they can introduce moisture that can cause problems. If you are unsure how to take your machine apart for cleaning, refer to your user manual or search your machine make and model online. After you have thoroughly cleaned the machine, oil it appropriately.
Rule #1: You should oil your machine after about every 4-8 hours of sewing use.


Rule #2: Change your needle after about 2 hours of use.

To begin with, you may use white thread.

Outside Front/Back Panels
Take one Front Middle Panel and one Front Bottom Panel

With Right Sides Together (RST), place the shorter edge of the Front Bottom Panel along the long bottom edge of the Front Middle Panel, as pictured.

Pin together.

Stitch together using a 1/4" seam allowance. The metal stitch plate under the presser foot has markings indicating your seam allowance measurements,
or you can use the edge of the presser foot, which is just a little bit more than 1/4".

As we go along, remember to cut your thread tails as you work.

Press the seam open.

Back Front


With RST place the longer edge of one Top Panel along the top edge of the Front Middle Panel,
and pin in place.

Press seam open.
This is will be one of your outside panels, and it should look like this...

Repeat the above instructions to make one more panel.

Outside Side Panels
With RST, place the top of one Front Bottom Side Panel along the bottom edge of
one Front Middle Side Panel, and pin.

With RST, place bottom edge of one Top Side Panel along the top edge of the Front Middle Side Panel, and pin.

Stitch both edges using a 1/4" seam allowance.
Press seams open.

Repeat the above to make one more Outside Side Panel.
Single Sided Fusible Interfacing
Your medium weight interfacing should look something like this...

The fusible side has the tiny bumps, and the non-fusible side is smooth.
Place the wrong (back) side of one Outside Front/Back Panel to the fusible side of your interfacing.
Place the panel on the very edge of your interfacing, like so...

Press the iron on top of your fabric only. Do not move the iron around, just lift and press.

Then, cut your interfacing along the panel edge.

The back of the panel should now look like this...

There should be enough room to place one side panel along the top of the interfacing above where you cut out the large outside panels, like this...

Press the side panel back to the interfacing, then cut around it.
Repeat the steps above to fuse the other Outside Front/Back Panel and Outside Side Panel
to the interfacing.
Hint: Flip the next large panel to fit along where you cut out the previous panel.
When you are finished with this step, you should have all four pieces fused to your interfacing.
Sewing The Outside Front/Back and Sides Together
With RST, pin one Outside Side Panel to one Outside Front/Back Panel, matching the previously sewn seams, and the top and bottom edges.

Because the large panels have slanted edges and the side panels are straight, your panels will most likely not line up perfectly. This is okay! When you sew the panels together, place the panel on bottom that is loose (usually the large panel) with the tighter edged panel on top. As you sew together with 1/4" seam allowance, gently pull the fabric that is tight until you get to the next pin. The machine's feed dogs will naturally feed the little bit of extra fabric through as you stitch the panels together. Since you will be pulling a little bit on the fabric, make sure you have placed pins on the matching seams and top and bottom edges. Otherwise, your panels will not line up correctly.
If you have sewn it correctly, it should look like this...

Notice how well the panel seams should fit together.
If you had puckering, or your seams did not line up well, just unpick a little and try again!
Press the seam open.
Now, pin the other Outside Side Panel to the opposite side of the same large panel.
Stitch with 1/4" seam allowance. Press seam open.
Pin the final Outside Front/Back Panel to one of the Outside Side Panels.
Stitch with 1/4" seam allowance. Press seam open.

You should now have all four pieces sewn together in one long piece.
We will sew on the ric-rac before sewing the two final edges of the outside of the bag together.
Decorative Ric-Rac
Place your large ric-rac, so the bottom edge of the ric-rac rides along the top of the bottom panel seam, like this...
See the seam? Place the ric-rac just barely over the seam

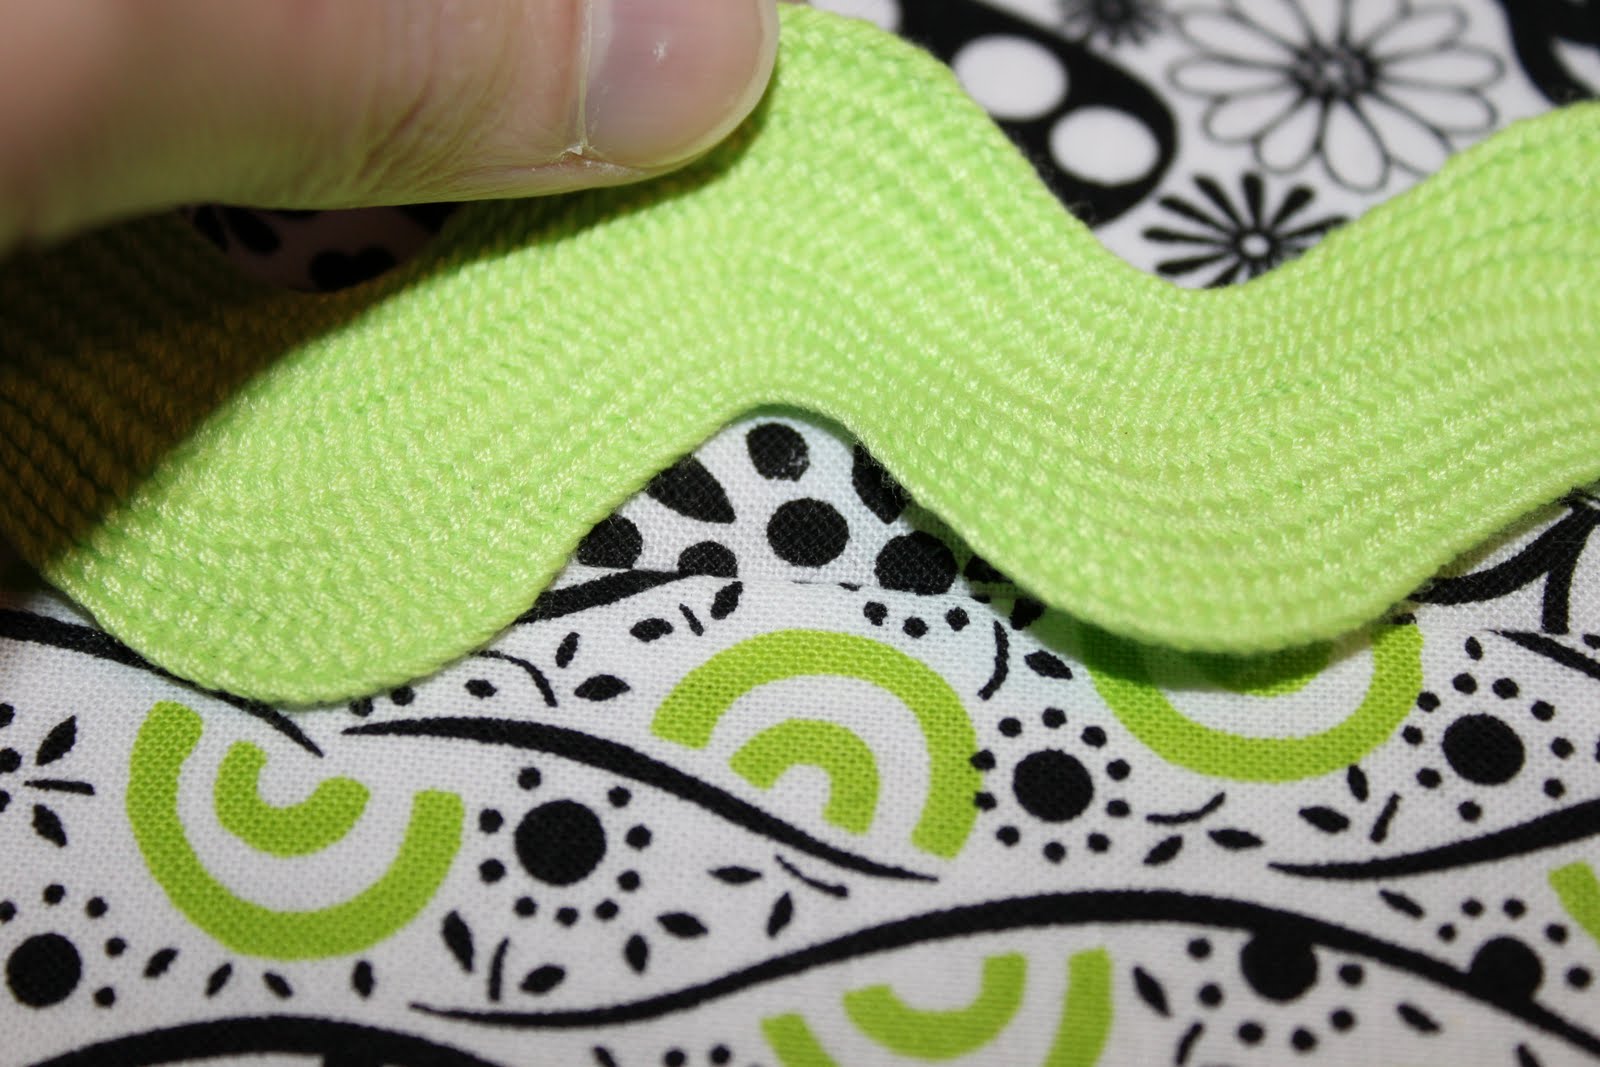
Pin the ric-rac in place, so that it covers the seam.

Switch out your top thread for a color that matches your ric-rac.

Sew along the middle of ric-rac.

It should now look like this...

Now, cut any excess ric-rac off the edges.

With RST, pin and sew the two ends of the four panel pieces together with a 1/4" seam allowance.
Try to get the ric-rac ends to line up as much as possible even if you fold it a little bit.

Press seam open.


Grab a hand sewing needle, and your thread.

We are going to tack down the edges of the ric-rac, so it will stay flat.
Place a small stitch on the top and bottom edges of the ric-rac that stick out.


This is what the inside should look like...

Adding On The Bottom Of The Bag
Pin the Tote Bottom cut from Fabric #3 to the bottom edge of the outside of your bag with the front/back/sides on top.

Sew with 1/4" seam allowance.
Clip corners of bottom as shown, careful not to cut through stitching.


Turn bag right side out.
Pellon Peltex II Interfacing
Measure and mark your Pellon Peltex II Ultra Firm Double Sided Fusible Interfacing on the plastic wrapper side to be 5 1/2" x 15 3/4".


Cut along your marked lines, then use that piece as a template to trace and cut
another one the same size.
Peel off the plastic and position the two sides that you removed the plastic from together, so the pieces are stacked on top of each other. Then, stitch the pieces together on your machine.
I sew a several seams width-wise about 2" apart.

Place the interfacing snuggly in the bottom of your bag,
then press the bottom of your bag to the interfacing.

Your tote bag should now look like this!


8 comments:
I am finished with this part however my bag does not stand as well as yours! also having a hard time finding the interfacing for the bottom...I bought the wrong stuff, will have to drive out of town tomorrow to see if I can find.
I was surprised that the sewing part was easier than I thought, the cutting the pieces took forever but the sewing moved right along....
this is fun! so fun I went out and bought more to make another...I can cut and fuse while waiting for the next set of directions.
I came to check the directions and to see if I have completed everything so far. I will iron the interfacing to the bottom as soon as I post this comment. I will wait to see the next step. This has been fun and I too will probably make another, just not right now.
ok, couldn't find the thick stuff anywhere, (3 stores) but I got it worked out and the step is done. I had to take thick stabilizer, stacked in 2 like your directions then I took single sided fusable (all they had) dots up on both sides of the stabilzer and then sewed it all together, thus I made it fusable on both sides...it was extra time but it worked...
I have now completed 2 totes up to this step...
Hey Jenna,
I'm caught up to this point. I wish I would have bought enough fabric to make two!
The last side (when sewing the long piece into one to make the circle didn't line up well at all on the bottom. I lined my top because I thought it would look better, but my ric-rac isn't lined up...But so far I am happy with it, since I have never sewn before!
Malinda, my advice would be to always match seams first, then match top and bottom. If you pin it in that order and stretch the fabric just a little bit, it should line up well.
Ready when you are! :)
I'm finished with this part!
Post a Comment