
Everyone ready to finish your tote bags??
I am excited to see them all!
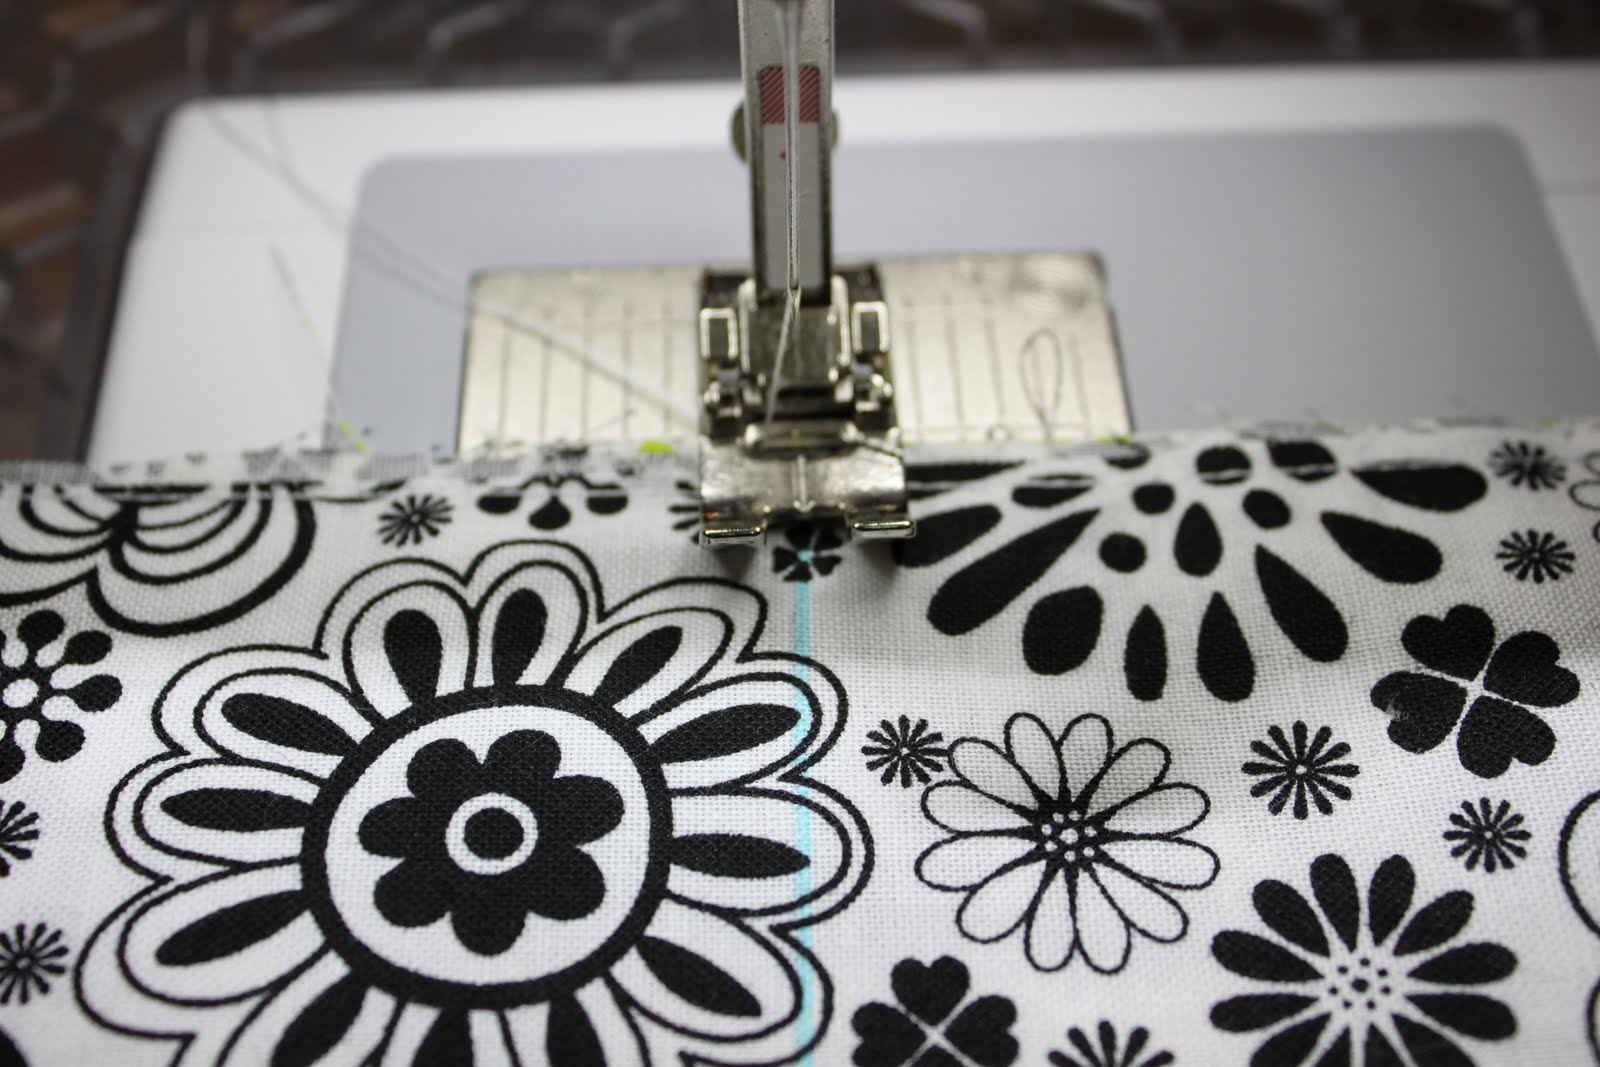
Top Panels/Top Side Panels
Pin and sew with 1/4" seam allowance Top Panel (long edge) to Inside Panel (narrow edge), as shown.

Repeat using other Inside Panel and Top Panel.
Pin and sew using 1/4" seam allowance Top Side Panel to Inside Side Panel as shown.

Repeat using other Inside Side Panel and Top Side Panel.
Large Pocket Panels
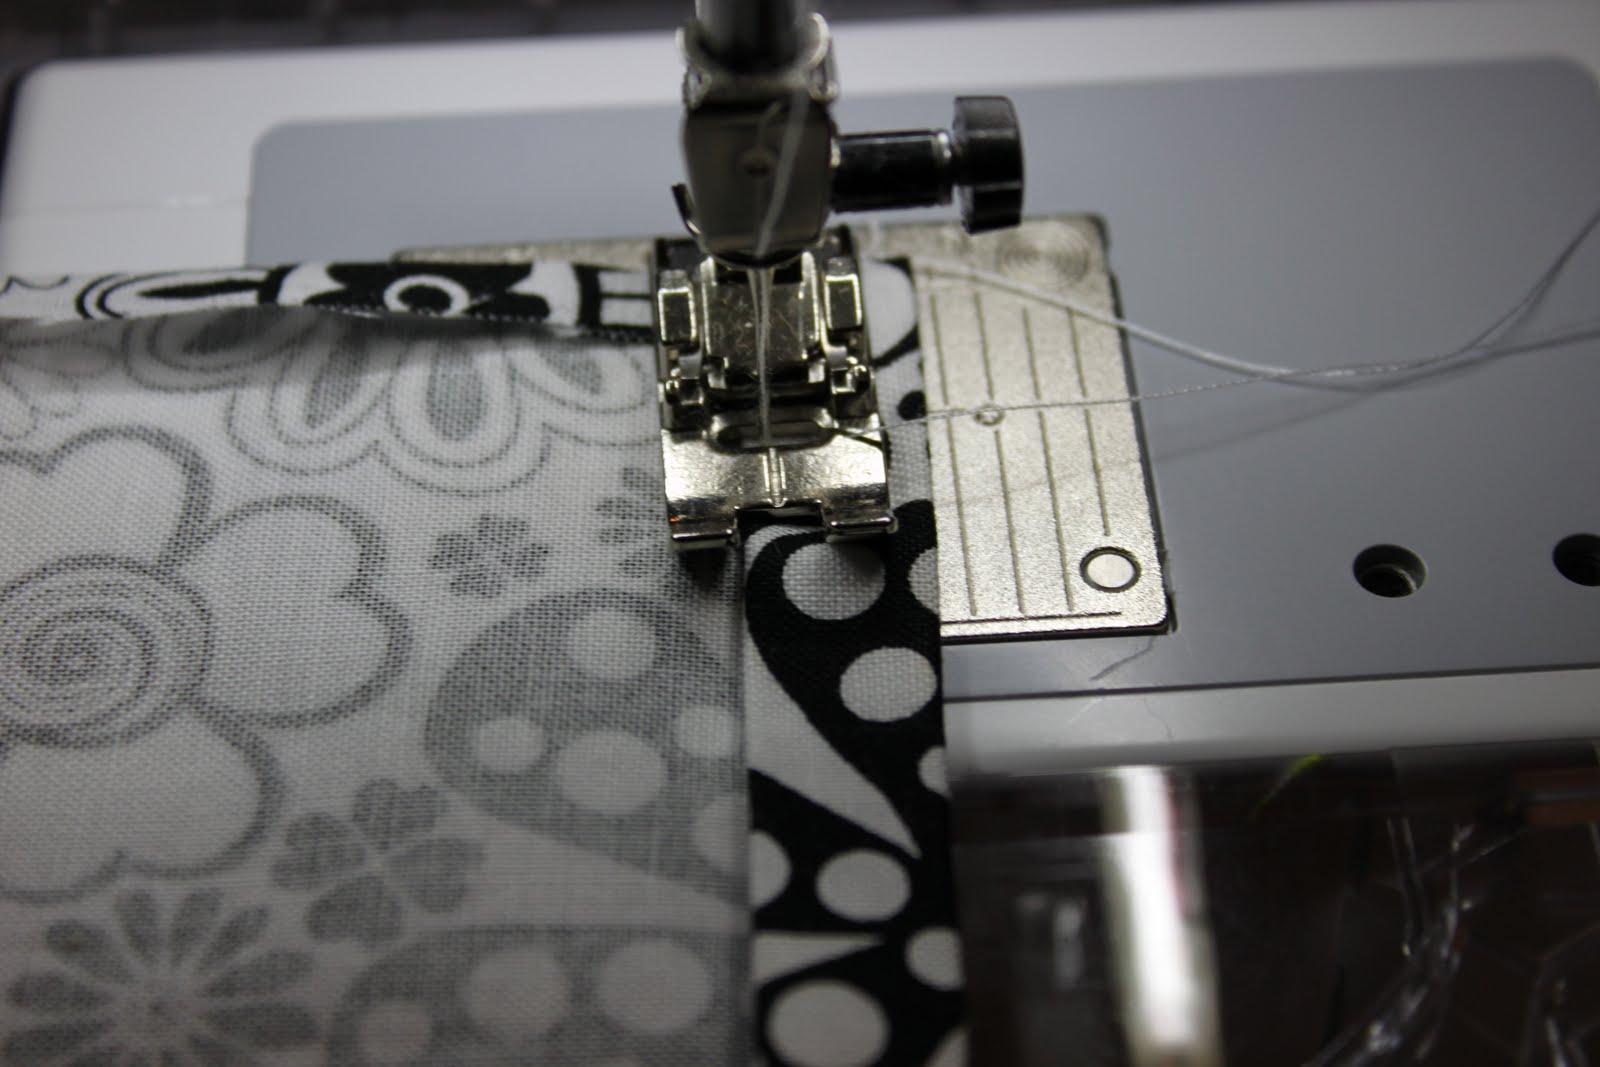
With RST pin one of your marked Large Pocket Panels to another unmarked Large Pocket Panel along the smaller (narrower) edge. Then, sew together using 1/4" seam allowance.

Press seam open

Then, fold so that wrong sides are together, and press along sewn edge.

Topstitch a 1/8" seam allowance along top edge of Large Pocket Panel (you will be sewing over the top of the seam you made above).

Place large pocket panel along bottom edge of Inside Panel. Pin along sides and bottom only.


Sew along sides and bottom of Large Pocket Panel/Inside Panel with 1/8" seam allowance.

Starting at bottom edge of Pocket Panel/Inside Panel, sew along your marked pocket dividers. Be sure to backstitch when you get to the top of the pocket.
Your Large Pocket Panel should now be divided into two or three pockets.

Remove your dividing marks according to the manufacturer's instructions.

Repeat using the other two Large Pocket Panels and Inside Panel.
Small Inside Pocket
Press 1/4" of Small Inside Pocket to reverse side along all edges.


Fold over and press the top edge of the pocket down another 1/2".
(The top edge of pocket should be folded 1/4", then turned under another 1/2" to encase the raw edge)

Sew along folded edge of top pocket with 1/8" seam allowance.
Place and pin Small Inside Pocket to Inside Panel according to placement on the pattern.

Sew along sides and bottom of Small Inside Pocket using a 1/8" seam allowance and backstitching at both top edges.

Optional: Repeat on other Inside Panel if you are placing two Small Inside Pockets.
Inside Side Panels/Tote Bottom
With RST, pin bottom of one Inside Side Panel to one small edge of the
Tote Bottom cut from Fabric #2.

Sew using a 1/4" seam allowance.
With RST pin bottom edge of final Inside Side Panel to other small edge of the Tote Bottom piece.

Sew using a 1/4" seam allowance.
Press both seams open.

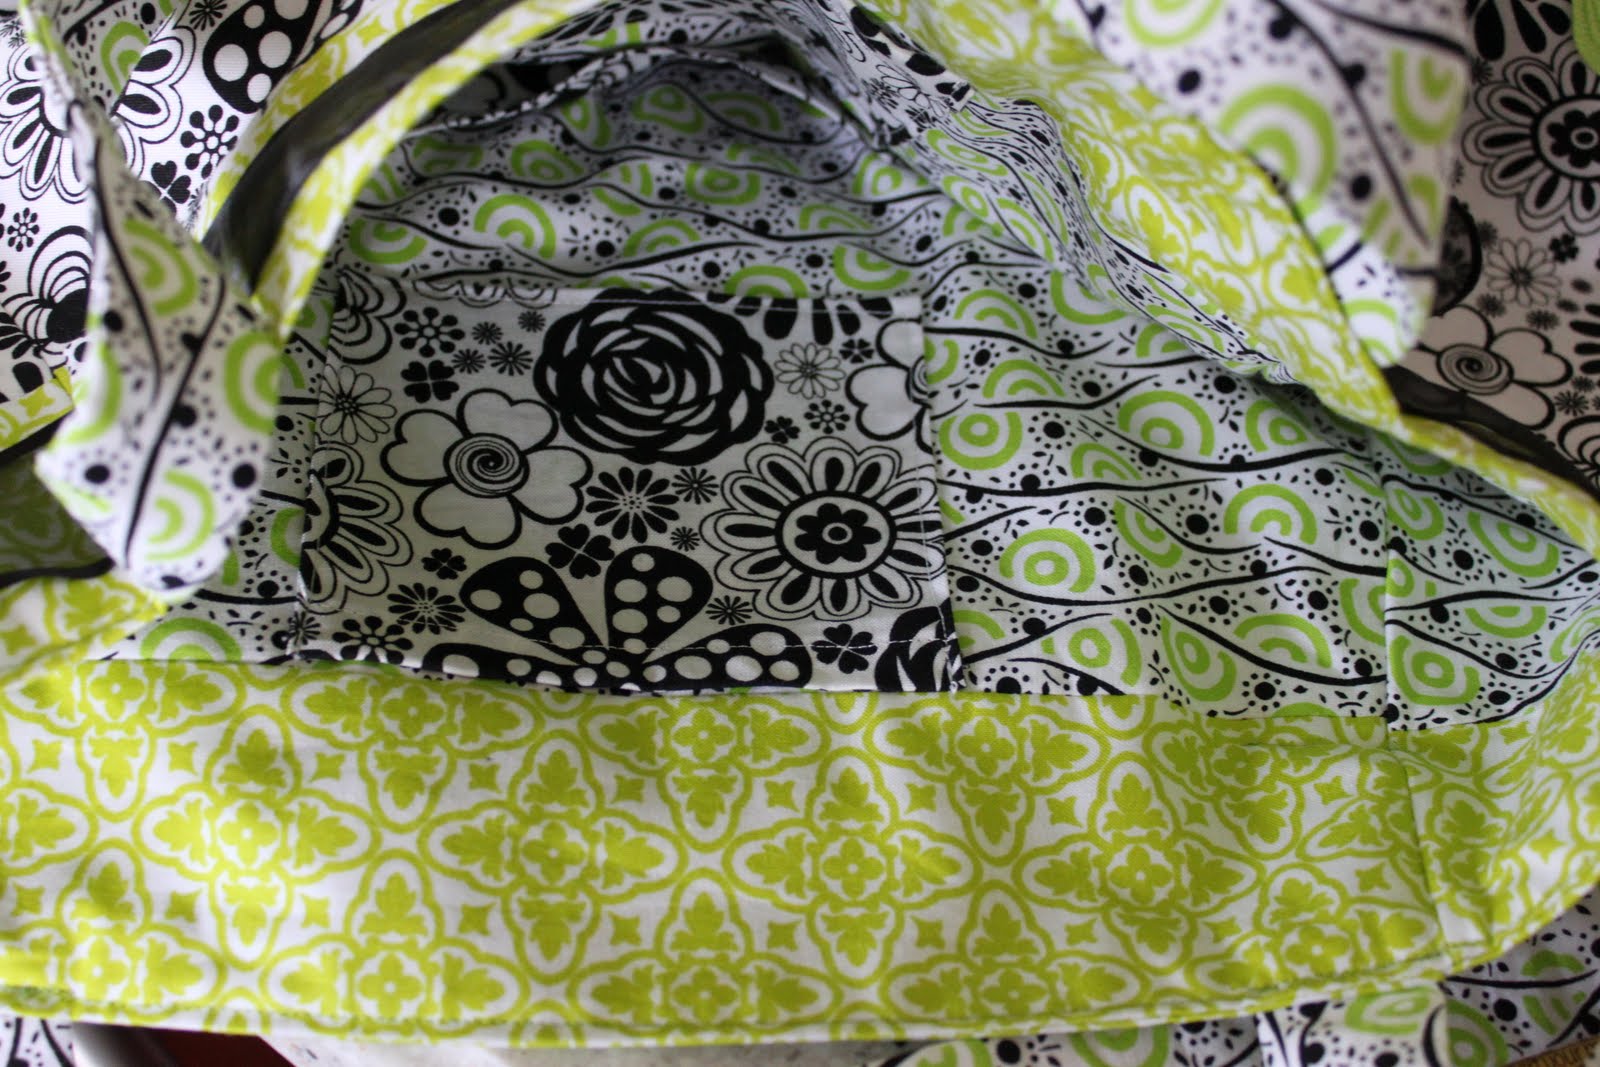
Finishing Tote Lining
Placing pins on the Inside Panel side, pin the Inside Panel to the Tote Bottom/Inside Side Panels.
Please pin together in this order: 1. Match seams along the top of both panels (not the top edge), 2. Pin the bottom edge of the Inside Panel 1/4" below the seam of the Inside Side Panel/Tote Bottom, 3. Match top edges, 4. You should still have a large area between the matched seams pin and the bottom pin that has not yet been pinned, you will most likely need to stretch the side panel fabric to allow it to match the edge of your Inside Panel, pin a few times, 5. Place a few pins along bottom edge of Inside Panel to Tote Bottom.

Notice the pins are not on this side, so we are going to sew with this side facing down.

Sew together with 1/4" seam allowance.
The Inside Panel is on top so that you can see where you have already sewn your Large Pocket Panel to your Inside Panel. Sew beyond the previous stitching, so you will not see it later on.
When you have sewn these together, turn it over and make sure everything looks okay especially your corners, if you are satisfied with your sewing, then clip your corners as shown below.

Next, pin final Inside Panel to Inside Sides/Tote Bottom in same order as noted above with the exception of leaving a 6" gap in the middle of your Tote Bottom. Do not sew along this 6" gap when you sew these two pieces together so that we can turn everything right side out when we sew the lining to the outside of the tote. Otherwise sew using 1/4" seam allowance.

With RST place the outside of your Tote Bag (sewn in Part 2) inside the Lining.

Pin together along top edge.

Sew together using 1/4" seam allowance.
Pull the Outside of you tote through the opening in the bottom of the lining.

Next, hand-stitch the opening closed by folding both edges under 1/4" and sewing together along fold.

Tuck your lining inside the tote bag and iron the bottom of the lining to the double-sided Pellon we previously ironed to the outside of the tote.

Now, iron top edge of tote.

I also iron along the side seams to help the bag retain it's trapezoid shape.

Change your thread to the coordinating color, if you have not already done so.

Top-stitch using 1/8" seam allowance along entire top edge.

Tote Straps
Layout one strap on your one-sided medium interfacing.

Press.

Cut out.

Turn up one edge 1/4".

Fold the strap in half lengthwise, and sew the short end with 1/4" seam allowance only on the end of the strap you did not turn under.

Pivot your needle, and sew down the length of the strap with 1/4" seam allowance.

Keep the end turned up as you sew off the edge of the strap.

Trim both corners and edge as shown (note on the end, I have cut the fabric about 1/8").

Turn the strap using a loop turner, or a pen will work.

Press making sure you keep the open end turned under.

Pin the strap along side seams of tote front as pictured,
careful to pin on the same side of the strap, so it doesn't twist.
Note: The seam where the ric-rac is sewn together = the back of the tote.

Sew across the top and bottom of the strap with 1/8" seam allowance as shown.

Repeat with the other strap, and sew it to the back side of the tote.
Ribbon
Feed your ribbon through the belt loops on the straps.

Tie your ribbon to the right of the left front strap (if you are facing the tote). Cut to desired length.
I strongly recommend applying Fray Check to prevent the ends from fraying.


Grab your hand needle and matching thread to secure the ribbon.
This takes a little practice, but you will need to catch a little of the ribbon, then slide your needle between the two layers of fabric so the stitches don't show on the inside of the tote.
You will want to secure both the top and bottom edges of the ribbon.

Notice the stitching does not show on the inside.
After you have finished securing your ribbon, put your iron on a low setting like silk,
and press the ribbon.
Hooray! You are finished!!
Please email me some pictures of your finished tote, so we can all see what you have made!


2 comments:
Thank you very much for hosting this sew along, I learned so much! I have finished my tote, well I made 3 of them actually! LOL
For pictures I have blogged the results at
http://lisamacomber.blogspot.com/2010/06/tote-bag-sew-along-all-finished.html
Looking forward to more projects if this one was not to much work for ya!
My tote bag is done and I love it. I hop to make another soon, maybe with more of a contrast in fabrics. Your tutorial was excellelnt and I would sew-along with you again if you do another project. Thanks so much! I posted pictures on my blog and sent you an email.
Sherry
Post a Comment